Easy Formula for Creative Memories Scrap Journal Layouts!
If you’ve ever opened a Creative Memories Scrap Journal album and immediately thought…“Well now what do I do with this size?!”...you are absolutely not alone 😊
The Scrap Journal (6.75" × 10") is not a standard scrapbook size. Most layout ideas and sketches you see online are designed for 12" × 12" or sometimes 8" × 8" pages — so when you sit down with this tall, narrow page, your brain sort of freezes.
And yet… it’s actually one of my favorite albums.
The compact format makes it perfect for memory keeping on the go, quick projects, gift albums, trip journals, or everyday stories you don’t want buried in a giant album. It’s small enough to handle easily and I love that it is the perfect size to pop into your "analog bag" to take with you wherever you want to work on it - coffee shop Scrap Journal date anyone?
But so many of us are struggling with how to get started using it. But the trick is simply this: You don’t design for it the same way you design for a 12" × 12".
Here’s a mindset shift that may help:
You are not filling a big square page anymore.
You are building a vertical story panel.
Once you see the page as a tall storytelling space, everything becomes easier.
During my recent livestream (watch the video below!), I showed how to stop fighting with the size and instead make friends with it by using a simple formula that works every single time. If you didn't join me during the livestream, grab a beverage and watch before trying out the sample layouts below!
The Secret? A Repeatable Layout Formula!
Instead of trying to invent a brand-new design for every page, I wanted to share how to create multiple layouts using one easy approach.
This free-form, no-sketch approach focuses on:
Cutting a 12" x 12" paper into a 6.75" x 12" and a 5.25" x 12" strip,
Trimming and/or punching the 6.75" wide strip into blocks and borders to the fit the Scrap Journal pages
Using the remaining 5.25" wide strip to create photo mats for the photo sizes you are using
Flipping the patterns and arranging the pieces as you like!
That’s it.
No measuring gymnastics.
No complicated math.
No overthinking.
Four Scrap Journal Layout Examples using the Formula
Let's take a look at the four layouts I created in the video using the bright and playful On the Bright Side collection by Creative Memories...
Layout #1
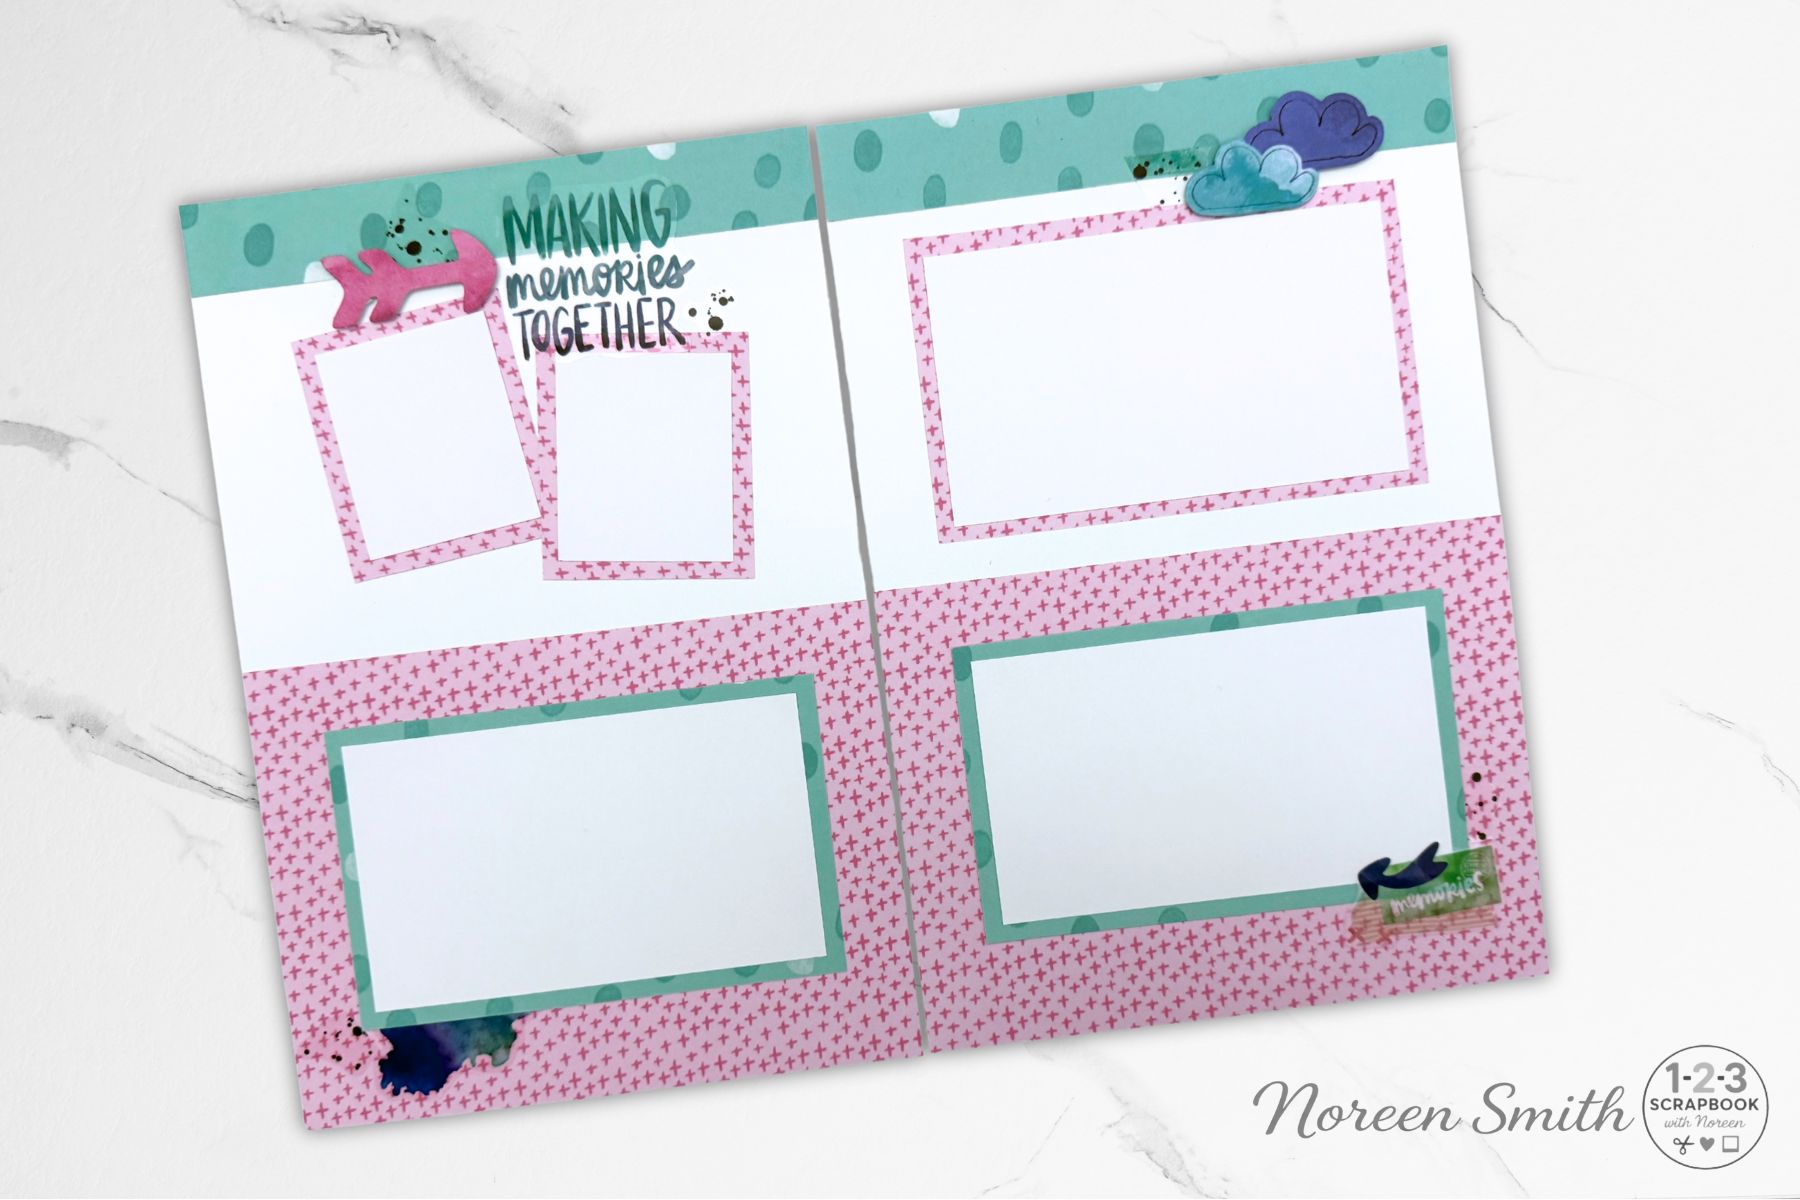
This first layout shows the basic structure - the 6.75" wide strip was cut into two 6.75" x 5" blocks and two 6.75" x 1" strips. The 5.25" wide strip was cut into three 5.25" x 3.25" photo mats and two 2.625" (2 5/8") x 2.25" photo mats. I settled on arranging the pieces as shown, but in the video I shared several other arrangements you could create using the same pieces. You could repeat variations of this design throughout an entire album and it would not look repetitive because your papers, photos and arrangement of the pieces would change the personality of each page!
Layout #2
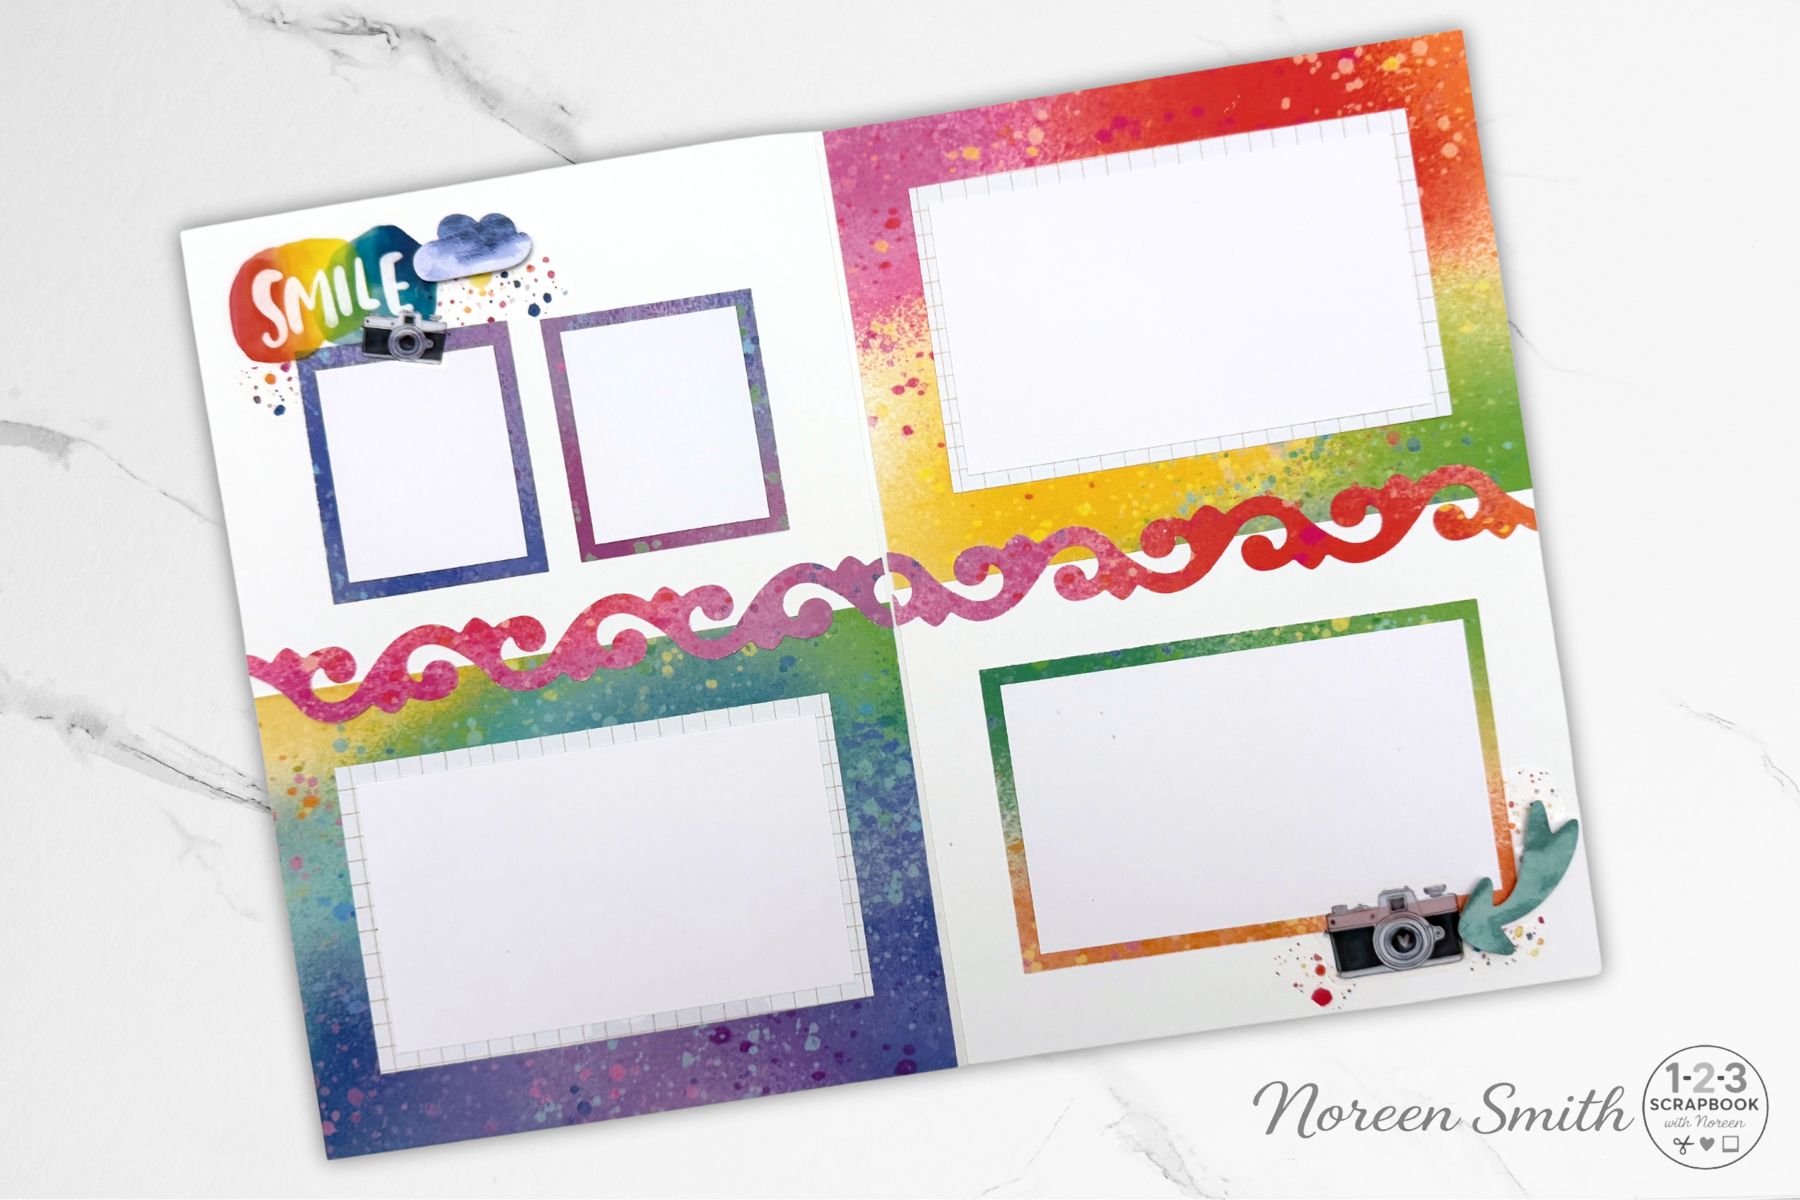
Before cutting the 6.75" x 12" into blocks, I punched two borders from the 6.75" strip with the Brocade Chain Border Maker Cartridge and the Original Border Maker System, then cut the remaining paper in half. Then I cut the 5.25" strip into the same photo mats as I did in the first layout, but arranged them all differently. Same formula - new layout!
Layout #3
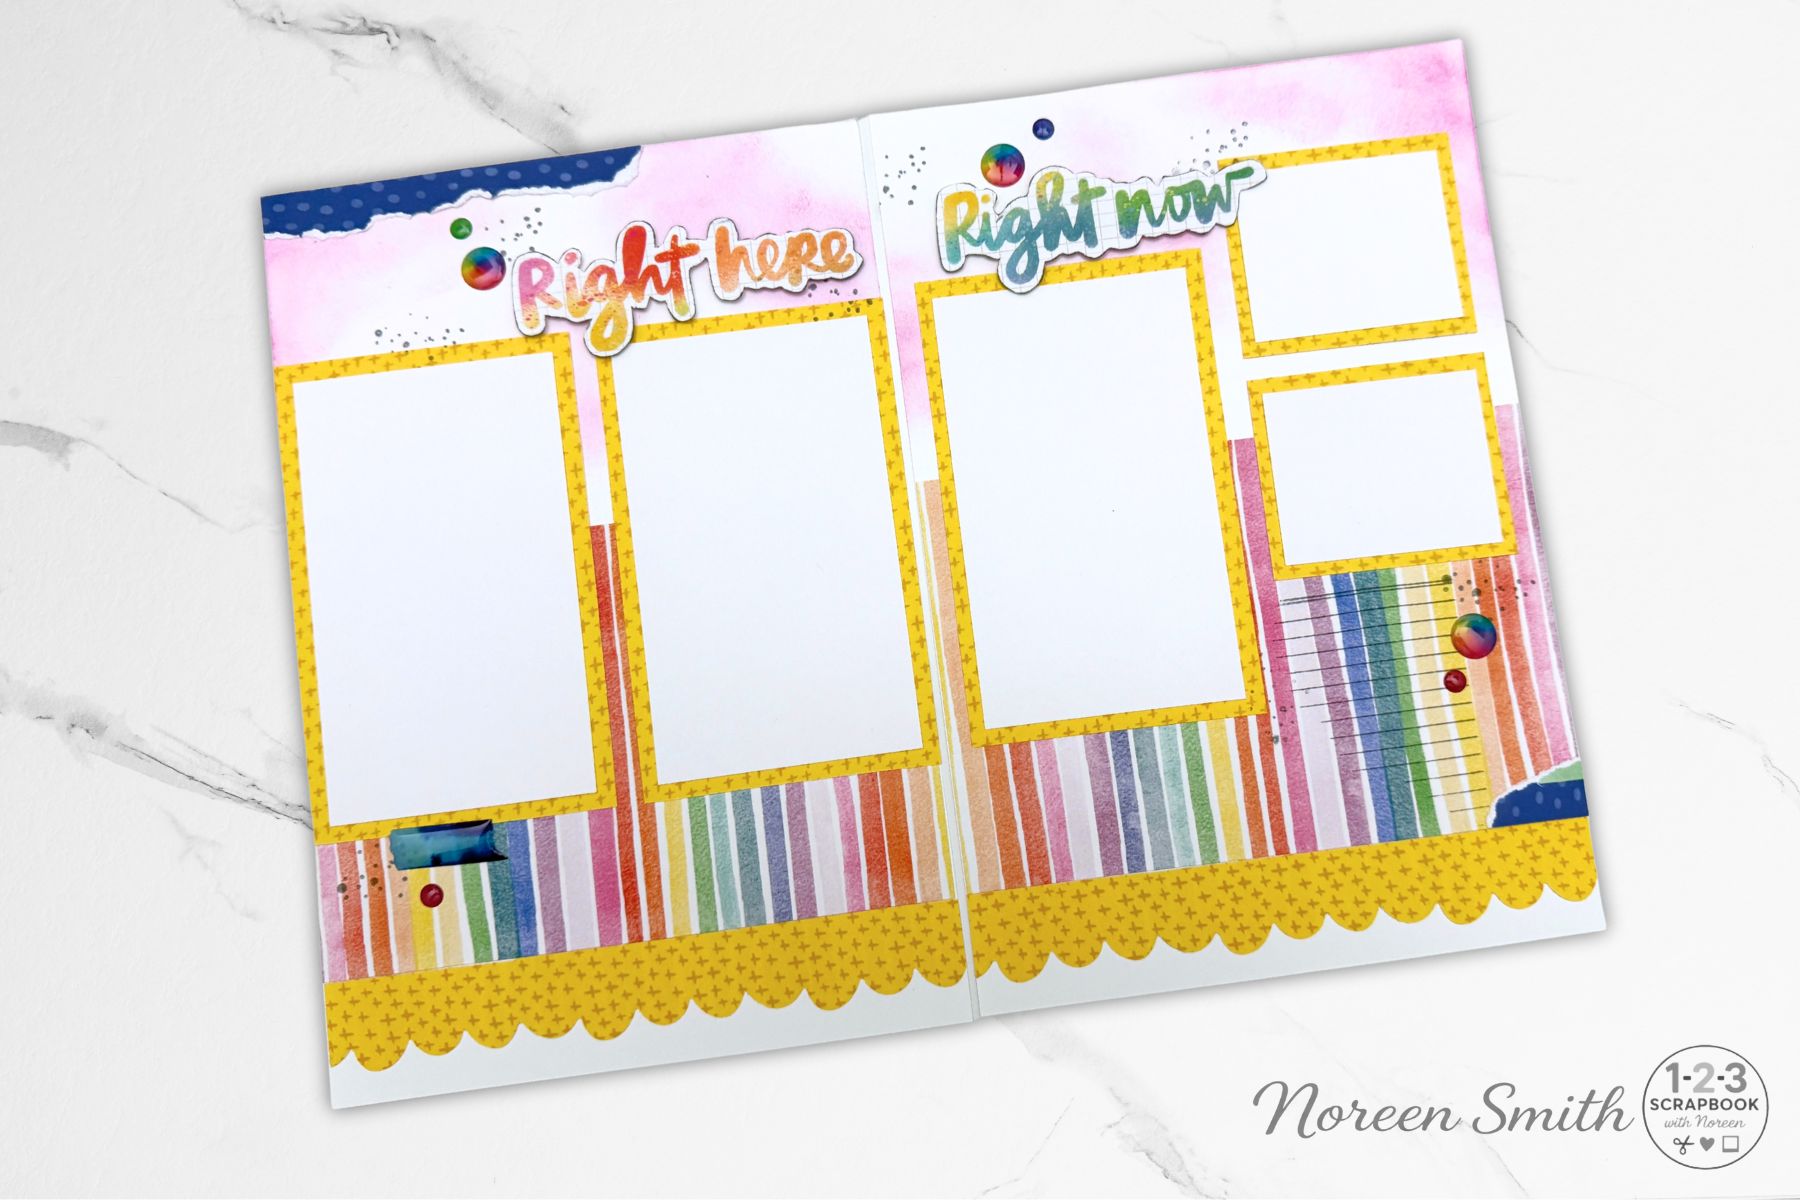
Another example: here I punched two 6.75" borders with the Whimsical Scalloped Border Punch first before cutting the remaining 6.75" strip in half. Then I cut the exact same size photo mats from the 5.25" strip - but placed them in yet another different arrangement. Plus, I couldn't stop myself from brushing a bit of Lilac Posies Memento ink onto the white cardstock base pages and stamping a few splatters and lines with Memento Tuxedo Black Ink and some old stamps from my stash for a completely different look. Are you starting to see all the possibilities with this formula?
Layout #4
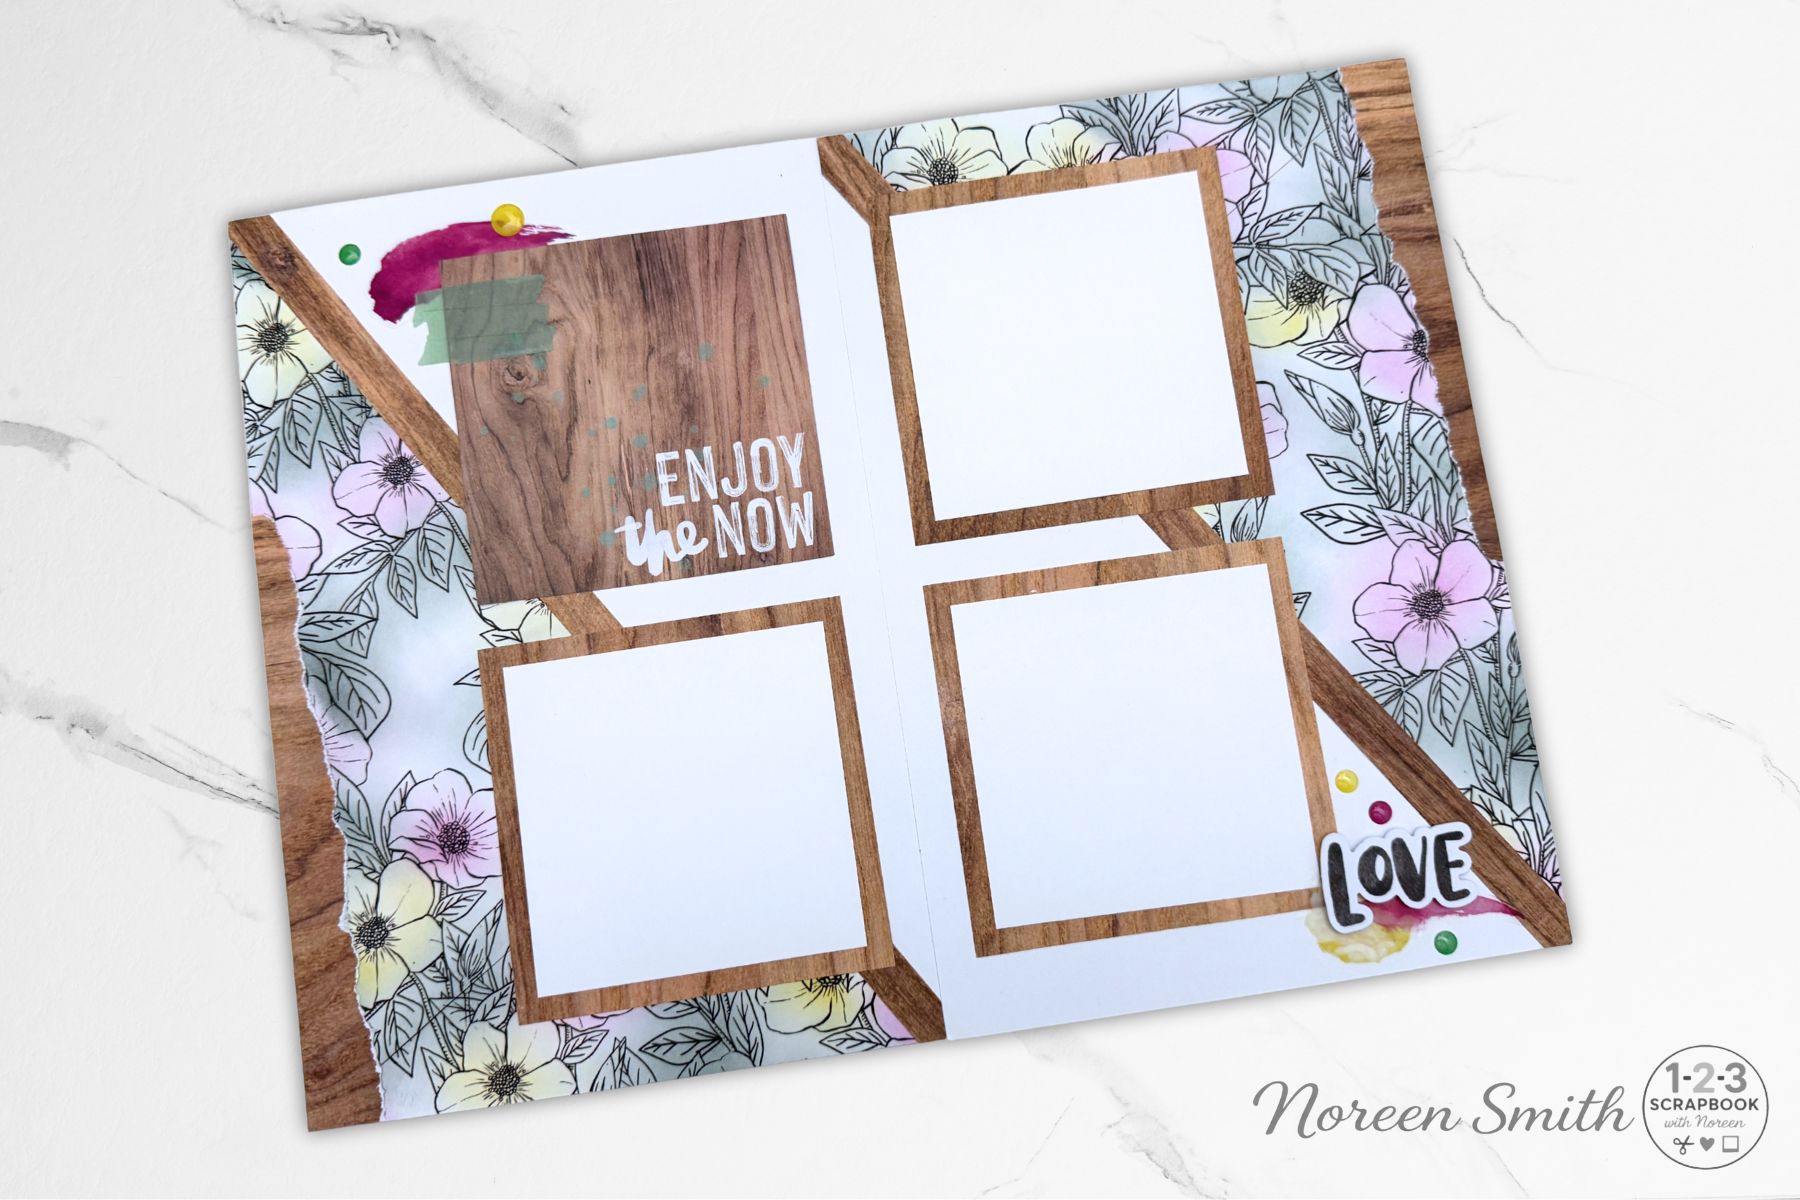
This was the wild card layout that I had lots of fun with! In the video you saw me experiment with cutting the 6.75" x 10" piece on the diagonal...and then I cut them again ha ha! After some rearranging off camera, I decided to piece the multiple triangles back into just two main triangles. I also went rogue with the 5.25" strip - I cut two .5" x 12" strips and three 4" x 4" photo mats from it and then added the 4" x 4" card from the embellishment pack to balance those out. Then I took the two leftover 6.75" x 1" border strips, gently ripped them to create a textured edge and added them to the sides of the layout. And finally, I loved taking a few minutes to gently brush Lilac Posies, Dandelion and Northern Pine Memento Inks onto the black and white floral paper - to me this is the perfect combo of a free-form "experimental" layout and getting a little bit inky. What fun!
The Scrap Journal Album Is Actually Easier Than You Think!
I hope this formula will help jumpstart your creativity when it comes to the Scrap Journal. And here’s something else that many of us don’t recognize about the Scrap Journal right away:
Large pages invite decoration while small pages invite storytelling.
This naturally shifts the focus toward meaningful photos and memories instead of trying to scrapbook everything. And that’s why so many people end up loving the Scrap Journal once they learn how to approach it!
This year I'm using it as a just-for-me album. I'm planning to include some personal journaling, memorabilia I've picked up in my day-today life, a book log and a list of to be read books, some playful mixed media "experiments", a monthly "currently" reflection page and small photos of those one-off events that seem unimportant to others but that I want to remember for myself. It will probably NOT be chronological and may even seem haphazard, but it will a visual representation of all that is going on in my crazy mind!
Try It Yourself!
If you have a Scrap Journal sitting on a shelf because you didn’t know how to start — this is your permission slip! Go grab a piece of 12" x 12" double-sided patterned paper from your stash and give the formula I shared in the video a try! If you don't love the result, try it with a different paper and a different arrangement - a few "wasted" pieces of paper is a small price to pay to get comfortable with this new size album!
You’ll be amazed how quickly you have a bunch of ideas of how you can use the Scrap Journal and what you want to include in it!
If you make some Scrap Journal layouts with this formula friends, I would LOVE to see them! Post them in our private layout sharing FB group so we can cheer you on — because taking a risk and creating a meaningful layout is always worth celebrating!
Happy scrapbooking!

2 comments
Thanks for the great ideas you are definitely an inspiration and always come up with great ideas and solutions.
I have used the journal twice. One was for the year of Covid, what happened during that year, working from home, listening to the news, waiting for the vaccine, and then I'm still working on one that I call the Year of Recovery after my unexpected heart failure. I decided to do one now for each year just for stuff about me.
A different type of diary. 🤗🙏

Love this size album! Thanks for sharing this formula and beautiful pages!